Fix iPhone cannot verify server identity errors
When using the mail applications on your Apple iPhone, you may have come across the issue “cannot verify server identity” if you’ve had one for a time. You’ll be relieved to learn that this short post will highlight a variety of fixes that, ideally, will allow you to send and receive emails once more without the dreadful error message showing.
Remember that several settings on your iPhone may appear to protect you from a bogus mail server certificate before making any changes to them. When connecting to a mail server, your iPhone will ask for the server’s SSL certificate and run a number of safety and security checks on it to make sure it is genuine.
If it finds that the certificate has expired, does not match the domain name for the email address, or has not been signed correctly, it will be flagged as untrustworthy and your iPhone will display the cannot verify server identity error warning you of the issue.
Most iPhone users may see this error at some time given the amount of emails we send and receive nowadays. The issue typically surfaces when you try to set up a new email account. Your mail settings may be transferred from one iPhone to another when you upgrade your iPhone, or perhaps the mail server certificates for every iPhone you own have run out. If you are receiving it on a regular basis would like to fix the error a number of solutions are below.
Fix iPhone server identity errors
Make sure your iPhone is displaying the correct time and date before forcing the Mail app to close in order to resolve the cannot verify server identity issue. The newest iPhone models only require a simple swipe up from the bottom of the screen to do this. This will display a list of all the programmes that are running on your computer right now. Allowing you to go through them from left to right. Locate the iPhone Mail app and slide it up to close it. Before reopening the Apple Mail programme after closing it, make sure the time and date on your iPhone are correct.
On older iPhone models that still have a physical home button, just navigate to the Home screen, swipe up to find the application, and then close it as previously mentioned. Double-click the home button on an iPhone 8 or before to see the most recently used applications. Go back to the Mail app and swipe up once more. Typically, this is all that is necessary to fix the issue, but if it persists, there are a few other options you can explore.
Force restart your iPhone
Before you fiddle with any mail settings on your phone, it’s a good idea to force restart your iPhone, as explained in our previous post, to make sure everything is working as it should and the operating system isn’t causing any issues. Like when you restart your PC, everything will load from scratch when you forcefully restart your iPhone.
Update your carrier Settings
Update your iPhone’s carrier settings to fix any issues you may be having with your iPhone, as we previously covered in this helpful tutorial. This is another another piece of advice for upkeep. It’s crucial to get the most recent iOS update from Apple to keep your phone’s operating system up to date. To do this, simply go to Settings > General > Software Update. If you turn on automatic updates going forward, your device will continue to receive them.
Reset your phone’s network settings
Another area that can be troublesome is your iPhone’s network settings, but you can quickly change them by following the instructions below. After finishing this process, all Wi-Fi networks and passwords, cellular settings, and previously used VPN and APN settings will be reset.
- Launch the Settings app on your iPhone.
- After that, choose “General.”
- From the drop-down option at the bottom of the General screen, choose “Transfer or Reset iPhone.”
- At the bottom of the screen, click “Reset.”
- Choose “Reset Network Settings.”
If you are using iOS or iPadOS version 14 or earlier, select Settings > General > Reset > Reset Network Settings.
Remove the email account
If you are still experiencing the cannot verify server identification issue on your iPhone after completing the preceding instructions, it might be worthwhile to delete and remove the mail account and set it up again from scratch. To do this, just follow the instructions listed below for the most recent iOS version.
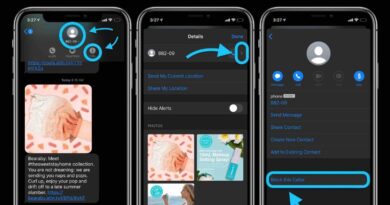
- Open up the Settings app on your iPhone.
- When you go to the “Mail” app settings by scrolling down to the bottom, tap them.
- Tap the “Accounts” column under Mail.
- You’ll find a list of your active email accounts on your iPhone here. After selecting the affected Mail account, tap to see the settings.
- Select “Delete Account” from the bottom menu to remove the mail account. Be sure to backup all of your emails if you downloaded any emails locally to your iPhone before doing this. In the event that the host supports IMAP, as many servers do, your emails will be safely preserved on the server while you wait to connect.
- To confirm that you wish to delete the email account from your iPhone, tap “Delete from My iPhone.”
- Click “Add Account” after returning to Settings > Mail > Accounts.
- After deciding on an email provider, enter the details for your email account according to Apple’s instructions.
Unfortunately, if you have several email accounts that all show the same cannot verify server identification error, you might have to wipe everything off and start again. Create each unique email account after doing so.


